Documentation
cryo is an unusual file manager, especially the visual bookmarks and peer to peer file transfer features. This page describes the basics for common use cases.
Node view
The node view is graph based and lets you bookmark various items.
Bookmarks
The nodes in the right view represent bookmarks to quickly jump between locations.
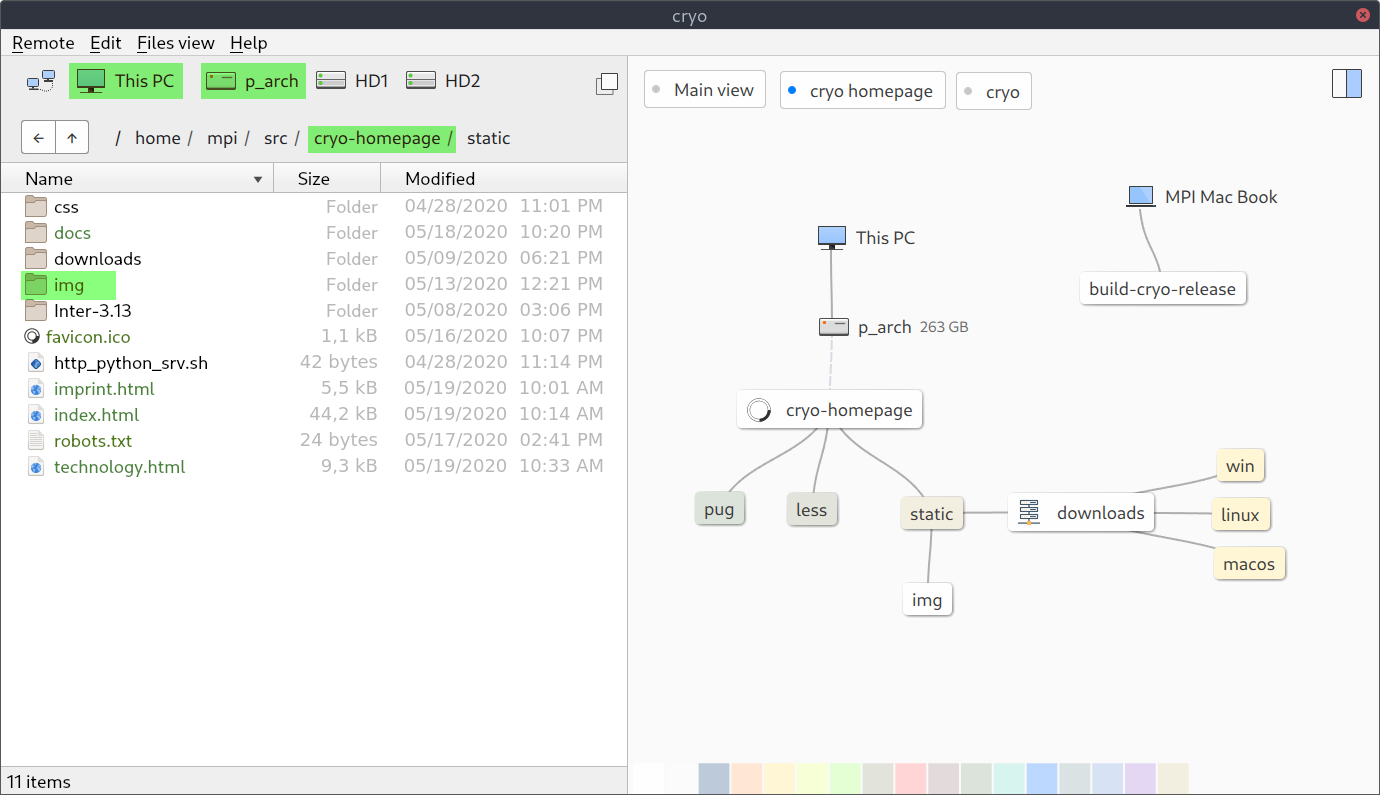
Create bookmarks
In the screenshot above all the green marked items can be dragged in to the view to create bookmarks. This works for:
- Folders from the file pane
- Hard drives
- Local and remote computers
- Shared folders on remote computers
- Breadcrumb path sections
To give a node a color select it and click on the color swatches at the bottom of the node view.
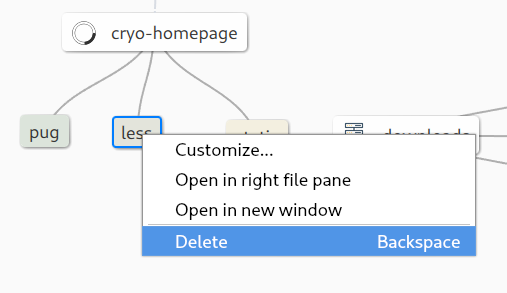
Remove bookmarks
The quickest way to remove a bookmark is to select it and press Backspace.
Note: This will only remove the bookmark not the actual location e.g. the real folder won't be removed.
As alternative a bookmark can also be removed via its context menu.
Multiple views
In order to not clutter the node view with dozens of bookmarks, multiple node views can be created, each with its own set of bookmarks. For example one view per project. Views work very much like tabs.
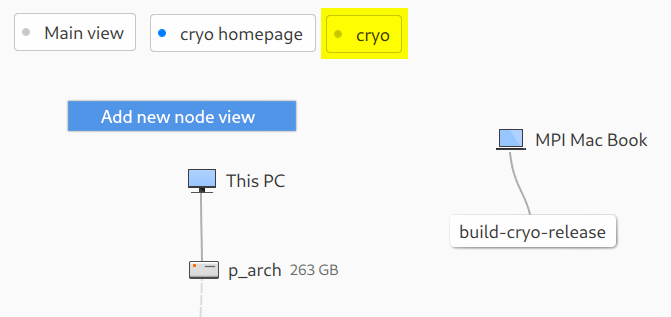
The screenshot shows three views: Main view
, cryo homepage
and cryo
on top. The currently active view is cryo homepage
and indicated by a blue dot.
Create views
To create a view right click on the empty space in the node view and select Add new node view from the context menu.
Remove views
To remove a view open the context menu of it and select Delete... this will also pop-up a confirmation dialog to prevent deleting a view accidentally.
Dual-pane mode
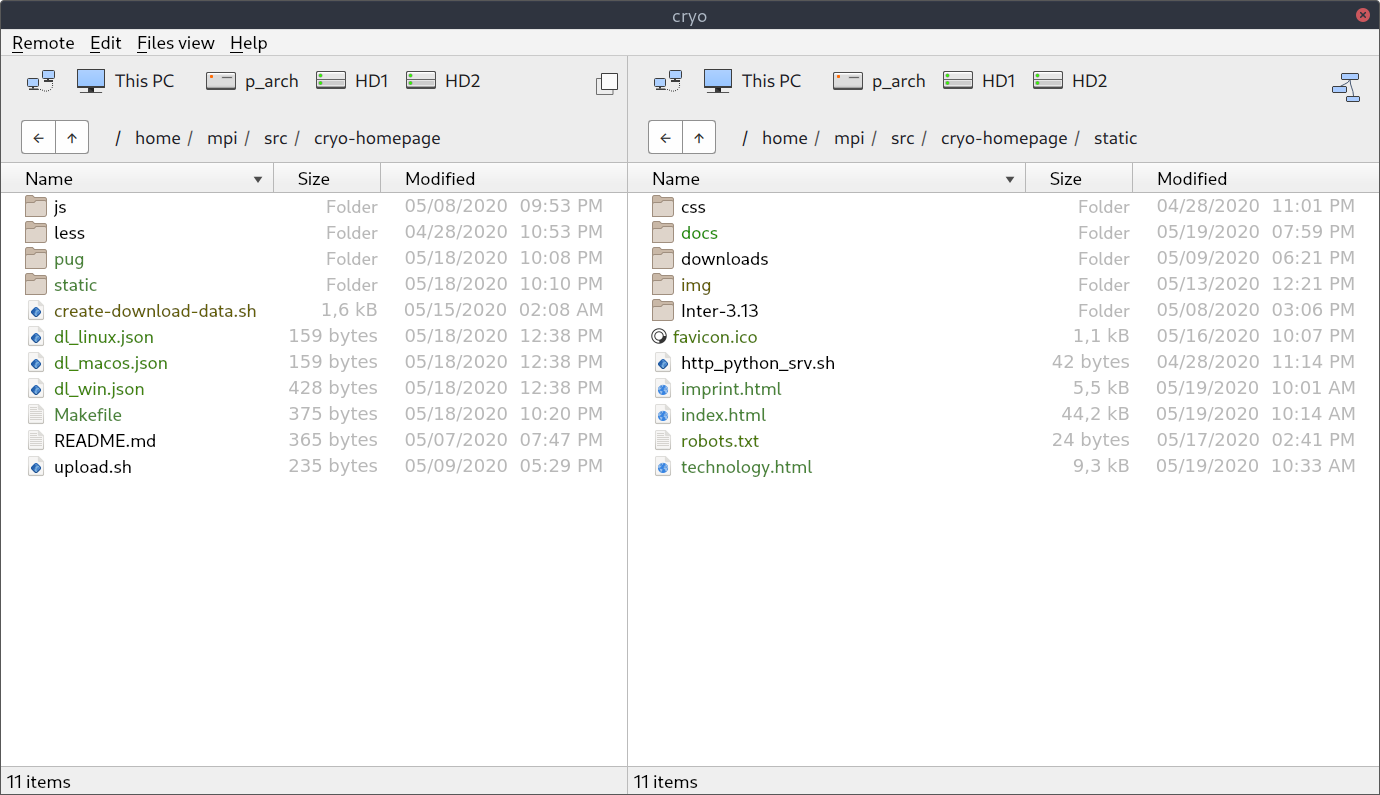
The dual-pane mode lets you quickly copy and move items between different locations and computers, either by drag and drop or keyboard shortcuts.
It supports tabs and common dual-pane shortcuts like F5, F6, F7 and F8 — see Keyboard shortcuts →
Toggle dual-pane / node view
Switching between these two modes can be done in multiple ways:
- Click on the top-right corner icons for dual-pane and node view
- ⌥+Down / Ctrl+Down keyboard shortcut
- Middle mouse click on a bookmark to opens the respective location in the right file pane
- Mouse gestures by far the fastest way — see Mouse gestures →
Keyboard shortcuts
File operations
macOS
Win/Linux
Description
⌘+DownReturnOpen file in default applicationSpaceSpaceOpen in Preview⌘+CCtrl+CCopy⌘+XCtrl+XCut⌘+VCtrl+VPasteF2F2Rename⌘ ⌫DelMove to trash⌘ ⌥ ⌫Shift+DelDelete permanently⌘+Shift+NCtrl+Shift+NCreate new folder⌘+TCtrl+TCreate a tab⌘+WCtrl+WClose a tab-Ctrl+TabCycle between tabsNavigation
macOS
Win/Linux
Description
⌘+UpAlt+UpGo to parent folder⌫BackspaceGo to parent folder-Alt+LeftGo backDual-pane mode
macOS
Win/Linux
Description
TabTabSwitch focus between left and right pane⌥+DownCtrl+DownToggle dual-pane mode / left pane + node view⌘+RightCtrl+RightOpen current folder in right pane⌘+LeftCtrl+LeftOpen current folder in left paneF5F5Copy to other file paneF6F6Move to other file paneF7F7Create new folderF8F8Move to trashMouse gestures
These let you navigate very fast by mouse without reaching out for a keyboard shortcut.
To invoke a mouse gesture:
- Press and hold the right mouse button
- Drag the mouse in the direction for a given action (distance like 2 cm)
- Release the mouse
Left and right file panes
- Up
- Go to parent folder
- Left
- Go back
Node view and right file pane
- Down
- On a bookmark node enables dual-pane mode and opens the location in the right pane.
- Down
- On the node view empty space opens the right file pane with its last location.
- Down
- Anywhere in the right file pane toggles back to node view.
File sharing
cryo supports free file sharing between computers over local network and Internet.
- Fast peer to peer transfers
- No cloud or middle server involved
- No registration or sign-up needed
- End to end encrypted
- No file size limits
The following section describes how file sharing in cryo works and gives an overview of the process. More background details can be found under Technology →
Connect computers via invitation
In order to share files between two computers they first need to be connected. This is done by using secure invitations. In the following example an invitation is created on a Windows 10 laptop named MPI XPS-13
and accepted on a remote Linux computer named skůll
.
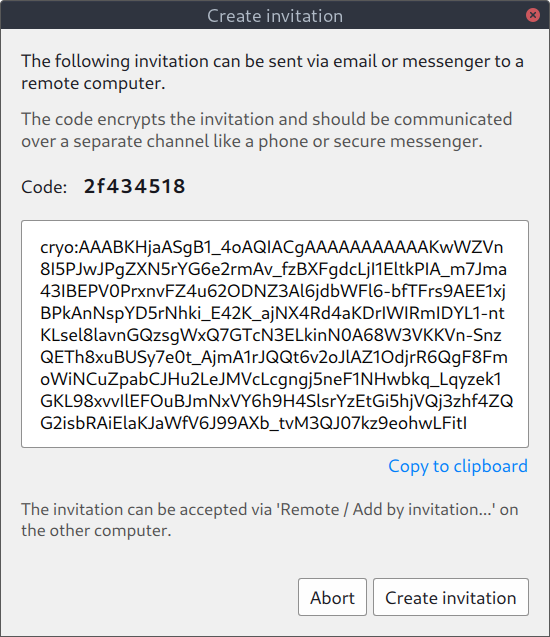
1. Create an invitation
Menu > Remote > Create invitation...
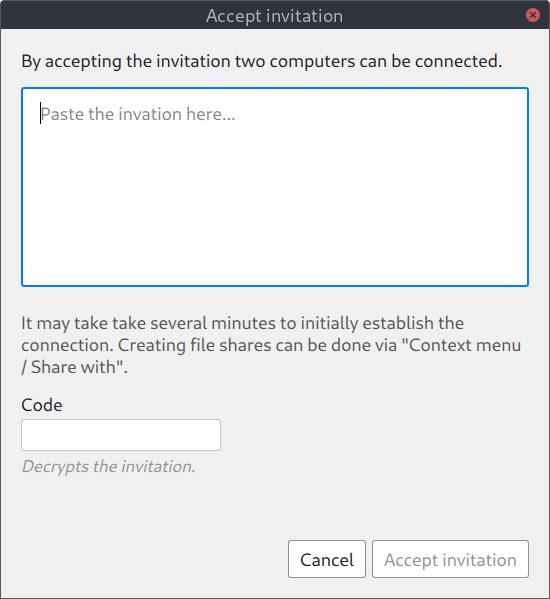
2. Accept the invitation (remote computer)
Menu > Remote > Add by invitation...
The computers can be in the same local network or in remote locations, in which case both computers need to be connected to the Internet.
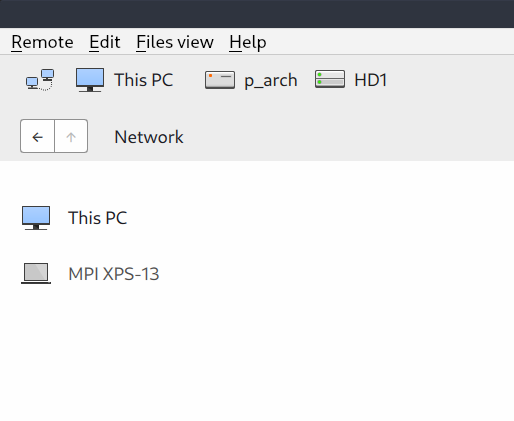
3. Connecting...
Right after accepting an invitation the remote computer is shown in the network list, but not yet connected.
4. Computers are connected
As soon as the connection is established, the remote computer will be shown as active.
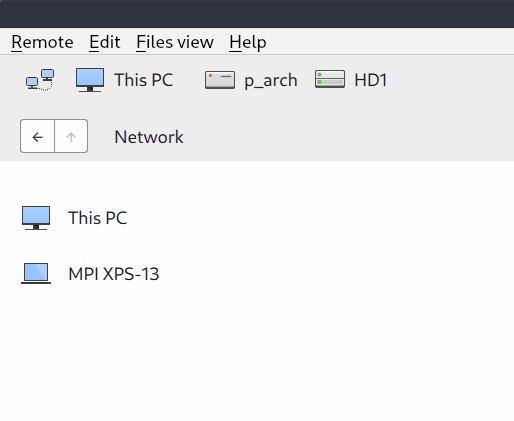
Depending on the network conditions connecting might take 1–2 minutes given that both computers are online. If either of the computers isn't online, the process will be resumed automatically as soon as both are online.
Sharing files
When computers are connected file shares can be created in the files pane.
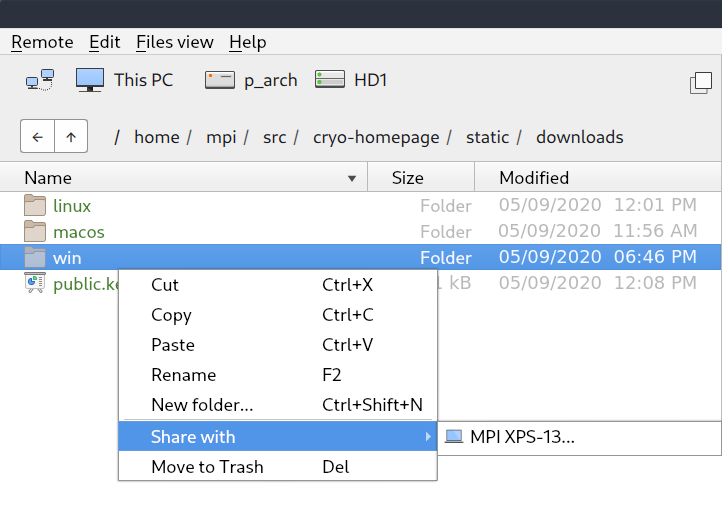
1. Share a file or folder
Select Share with
and the remote computer from the context menu.
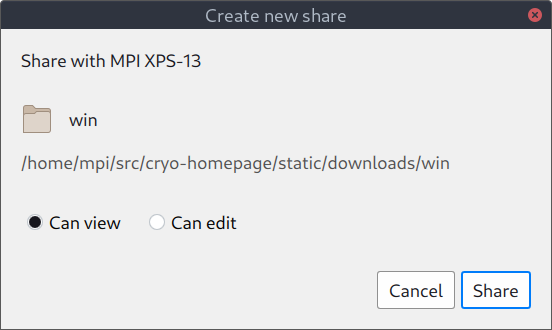
2. Specify access rights
In the dialog select either Can view
for read only access, or Can edit
for write access.
3. Viewing the share on the remote computer
New shares become visible right away.
